1. Introduction
This guide shows how to make a bug tracking system with FreeBSD, MySQL, Apache and Bugzilla.
Since many of these commands have long outputs, the transcript segments included here show only the portions where inputs are required. Here’s a full transcript of the guide being carried out.
|
|
Security Hazard
This guide’s suitable for computers accessible only to trusted people on private networks. Deploying Web-based applications like Bugzilla on Internet-accessible computers is hard to do securely. This guide’s steps bring about at least two temporary periods of vulnerability:
|
| Software | Version | FreeBSD Package |
|---|---|---|
FreeBSD |
10.0-RELEASE-p11 |
N/A |
Bugzilla |
4.4.6 |
bugzilla44-4.4.6 |
Apache |
2.4.10 |
apache24-2.4.10_2 |
MySQL |
5.5.40 |
mysql55-server-5.5.40 |
Perl MySQL "driver" |
4.028 |
p5-DBD-mysql-4.028 |
2. Installation
-
Install Apache, MySQL, Bugzilla and Perl’s MySQL database driver.

Though a MySQL 5.6 package was available when this was written, p5-DBD-mysqldepended on 5.5; that’s why 5.6 wasn’t chosen.# pkg install apache24 mysql55-server bugzilla44 p5-DBD-mysql
3. Configure MySQL
-
Configure FreeBSD to start MySQL during boot by adding this to
/etc/rc.conf:mysql_enable="YES" -
Initialize MySQL. Some MySQL scripts will only run from a specific working directory (
/usr/localhere).# cd /usr/local # bin/mysql_install_db -
Allow only processes running as the
mysqlaccount to access MySQL’s database files.# chmod 700 /var/db/mysql -
Make a custom MySQL configuration file (
/usr/local/etc/my.cnf) to improve Bugzilla’s search performance. (See Bugzilla Doc section 2.2.2.2 for details.)[mysqld] max_allowed_packet=10M ft_min_word_len=2 -
Start MySQL.
 Security Hazard
When MySQL first starts, the MySQL root account’s accessible to all local FreeBSD accounts; the password’s empty. A malicious person could seize this opportunity to install a backdoor for later use.
This vulnerable state continues until
mysql_secure_installationfinishes.# service mysql-server start -
Run
mysql_secure_installationto close the barn doors MySQL leaves open by default.Answer
Yto all of its questions.# cd /usr/local # bin/mysql_secure_installation -
Make a
bugsaccount for Bugzilla to use to access MySQL. Because I love ducks, my password’sMacks1mum-Duxz!.# /usr/local/bin/mysql -u root -p Enter password: Welcome to the MySQL monitor. Commands end with ; or \g. Your MySQL connection id is 9 Server version: 5.5.40 Source distribution Copyright (c) 2000, 2014, Oracle and/or its affiliates. All rights reserved. Oracle is a registered trademark of Oracle Corporation and/or its affiliates. Other names may be trademarks of their respective owners. Type 'help;' or '\h' for help. Type '\c' to clear the current input statement. mysql> GRANT SELECT, INSERT, UPDATE, DELETE, INDEX, ALTER, -> CREATE, LOCK TABLES, CREATE TEMPORARY TABLES, DROP, -> REFERENCES ON bugs.* TO bugs@localhost IDENTIFIED BY -> 'Macks1mum-Duxz!' -> ; Query OK, 0 rows affected (0.01 sec) mysql> FLUSH PRIVILEGES; Query OK, 0 rows affected (0.01 sec) mysql> quit Bye
4. Configure Bugzilla
-
Run
checksetup.plto make an initiallocalconfigfile.# cd /usr/local/www/bugzilla # ./checksetup.pl -
Since
localconfigwill contain clear-text credentials, secure it:# chgrp www /usr/local/www/bugzilla/localconfig # chmod 640 /usr/local/www/bugzilla/localconfig -
Make a copy of
localconfigfor future reference, then edit the original’suse_suexecanddb_passparameters.# cp localconfig localconfig.orig # ex localconfig localconfig: unmodified: line 116 :%s/^\$use_suexec = 0/$use_suexec = 1/ $use_suexec = 1; :%s/^\$db_pass = ''/$db_pass = 'Macks1mum-Duxz!'/ $db_pass = 'Macks1mum-Duxz!'; :x localconfig: 116 lines, 5131 characters# diff localconfig localconfig.orig 44c44 < $use_suexec = 1; ---
> $use_suexec = 0;
67c67
< $db_pass = 'Macks1mum-Duxz!';
---
> $use_suexec = 0;
67c67
< $db_pass = 'Macks1mum-Duxz!';  ---
> $db_pass = '';
---
> $db_pass = '';use_suexecshould be turned on, since Apache runs aswwwon FreeBSD.Bugzilla will use this password (with the bugsaccount) to access MySQL. -
Run
checksetup.plagain. This time, Bugzilla will connect to MySQL, make thebugsdatabase, and create theadministratoraccount (used later to access the Web-based interface).# cd /usr/local/www/bugzilla # ./checksetup.pl -
Increase the attachments table’s size limit. The default limits attachments to a total of 4GB; this increases that to 100GB.
# /usr/local/bin/mysql -u root -p
Enter password:
Welcome to the MySQL monitor.  Commands end with ; or \g.
Your MySQL connection id is 5
Server version: 5.5.40 Source distribution

Copyright (c) 2000, 2014, Oracle and/or its affiliates. All rights reserved.

Oracle is a registered trademark of Oracle Corporation and/or its
affiliates. Other names may be trademarks of their respective
owners.

Type 'help;' or '\h' for help. Type '\c' to clear the current input statement.

mysql> use bugs;
Reading table information for completion of table and column names
You can turn off this feature to get a quicker startup with -A

Database changed
mysql> ALTER TABLE attachments AVG_ROW_LENGTH=1000000, MAX_ROWS=100000;
Query OK, 0 rows affected (0.05 sec)
Records: 0  Duplicates: 0  Warnings: 0

mysql> quit
Bye
5. Configure Apache
-
Configure FreeBSD to start Apache during boot by adding this to
/etc/rc.conf:apache24_enable="YES" -
Edit
httpd.conf. This configuration will cause Bugzilla to appear at the host’s base URL, such ashttp://bugzilla.example.net.# cd /usr/local/etc/apache24 # cp httpd.conf httpd.conf.dist # ex httpd.conf httpd.conf: unmodified: line 511 :%s/^#LoadModule cgi_module/LoadModule cgi_module/ LoadModule cgi_module libexec/apache24/mod_cgi.so :%s/^ServerAdmin you@example.com/ServerAdmin root@jamclod.kr0.net/ ServerAdmin root@jamclod.kr0.net :%s/^DocumentRoot "\/usr\/local\/www\/apache24\/data"/DocumentRoot "\/usr\/local\/www\/bugzilla"/ DocumentRoot "/usr/local/www/bugzilla" :a <Directory "/usr/local/www/bugzilla"> AddHandler cgi-script .cgi Options +ExecCGI DirectoryIndex index.cgi index.html AllowOverride Limit FileInfo Indexes Options Require all granted </Directory> . :x httpd.conf: 518 lines, 19627 charactersHere are the changes between the default
httpd.confand the newly edited one:# diff httpd.conf httpd.conf.dist 141c141 < LoadModule cgi_module libexec/apache24/mod_cgi.so --- > #LoadModule cgi_module libexec/apache24/mod_cgi.so 188c188 < ServerAdmin root@jamclod.kr0.net --- > ServerAdmin you@example.com 221,228c221 < DocumentRoot "/usr/local/www/bugzilla" < <Directory "/usr/local/www/bugzilla"> < AddHandler cgi-script .cgi < Options +ExecCGI < DirectoryIndex index.cgi index.html < AllowOverride Limit FileInfo Indexes Options < Require all granted < </Directory> --- > DocumentRoot "/usr/local/www/apache24/data" -
Start Apache:
Security HazardStarting Apache will cause Bugzilla to become remotely accessible, despite its incomplete configuration. In this state, Bugzilla allows anonymous people to create accounts. A malicious person could seize this opportunity to create an account that could be used later to view secret data.
This vulnerable state continues until Bugzilla’s Web-based interface is used to update its authentication settings. See the end of this guide for recommendations.
# service apache24 start
6. Configure Bugzilla: Web based
-
Browse to the host. Log in as the Bugzilla
administratoraccount created in step 4d, which will look something likeyou@example.net; in this guide the password’sMacks1mum-Duxz!.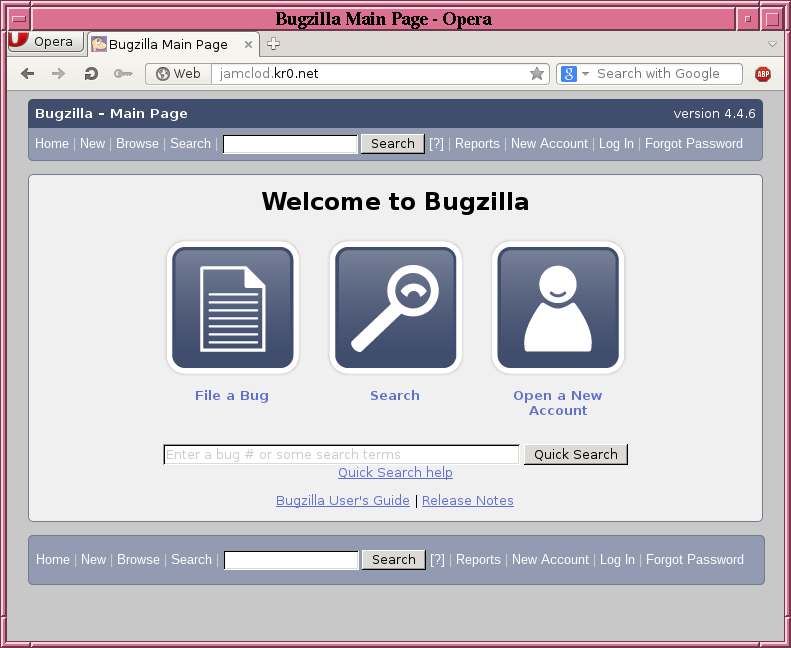
-
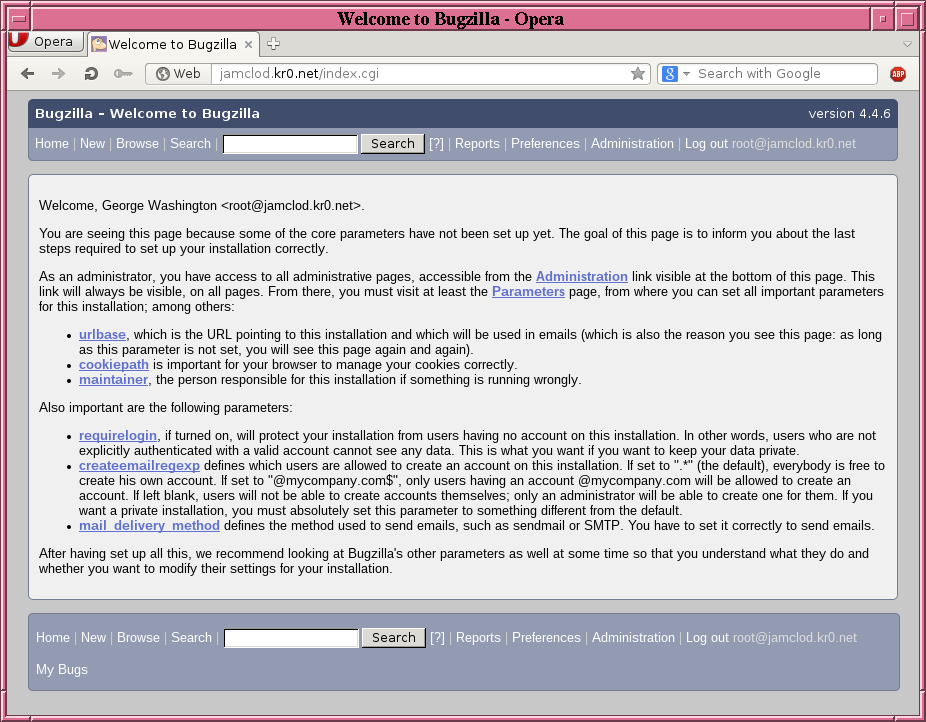
The "Welcome to Bugzilla" screen will guide you through the rest of the configuration.
-
Configure Bugzilla to allow only the administrator to create accounts, and to prevent anonymous read-only access.
-
Set urlbase to the base URL where Bugzilla resides. In this guide, that’s the host’s actual base URL, like:
http://bugzilla.example.net -
If this guide’s followed precisely, cookiepath should be left as:
/ -
Under
User Authentication:-
Turn
requireloginon. -
Remove
createemailregexp's value (.*by default).
-
-
Copyright © 2014 Robroy Gregg